How-To Tuesday: Crafting An Adorable Plush Penguin
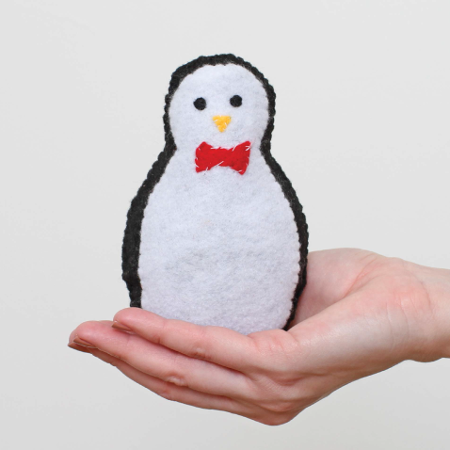
All this month, we're cracking open Quirk Throws You 5 Awesome Parties for how-tos to help your holiday party be The Greatest. This week, we'll show you how to make an adorable Plush Penguin. (This tutorial is also available in Craft-A-Day.) When you have a friend close by, the frigid days of winter feel a little bit warmer. Send your party guests home with a pocket-size penguin who will keep them company even in the worst of winter weather.
What you'll need:
- Pencil
- Parchment paper
- Scissors
- Black, white, red, and yellow felt
- Sewing thread
- Sewing needle
- Fiberfill
Directions
- Trace this penguin template onto parchment paper with a pencil. Make separate tracings of the outside shape, inside shape, and the penguin’s eyes, beak, and bow tie.
- Cut out the parchment shapes, and trace each shape onto black, white, red, or yellow felt. Cut an extra piece out of any color for the back of the penguin.
- Arrange shapes as in the photograph to form the front of the penguin. Sew together using a straight stitch.
- Align the back piece with the front. Use a blanket stitch around the outside edge to sew the front and back together. Leave a 1-inch opening along the bottom.
- Stuff with fiberfill. Use a blanket stitch along the bottom to sew penguin closed.


