Our Blog
15 Books About Geeky Women — Past and Present — In Honor of National Women’s Month
Happy National Women’s History Month! Along with celebrating International Women’s Day on March 8, the entirety of March is a time to celebrate the cultural and historical impact of women in America. And this year’s theme is perfect for book lovers like us — Weaving the Stories of Women’s Lives.
Sometimes the stories of great women are overlooked (the past is called “his-story,” after all), and as a lifelong geek myself, I know that it can be tough being a woman who identifies as a geek. But we’re definitely not alone! From historical women who helped shape the face of science and math to modern geeky heroes who show us that it’s OK to just be ourselves, let’s highlight some of these amazing women — and these great books about them!
Posted by Emily Kelley
How-To Tuesday: How to Make a Hardback Charging Station
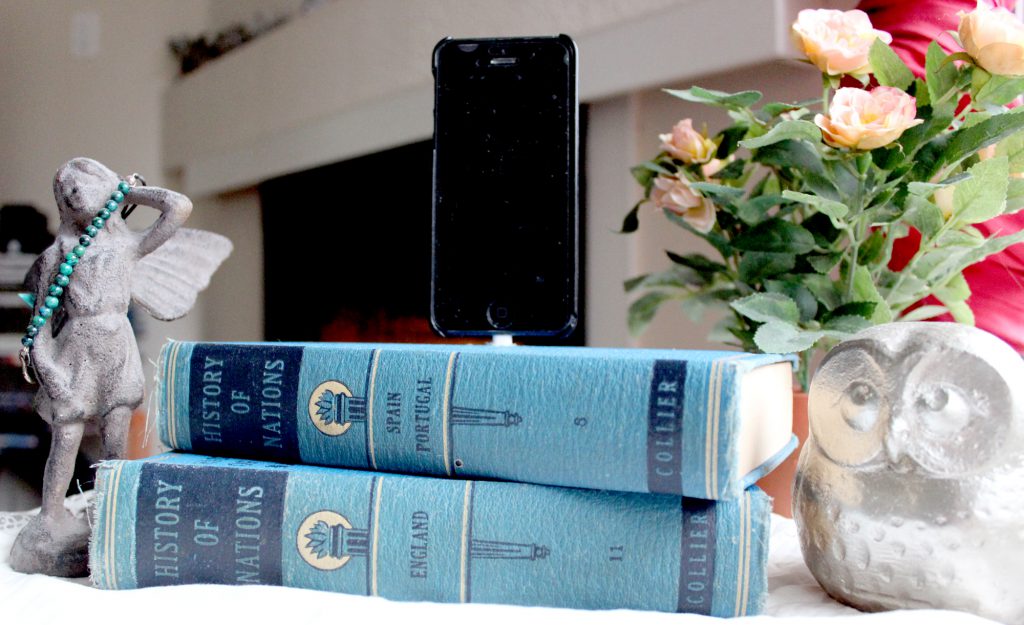
Welcome to the first How-To Tuesday of March! This week I’ll be showing you how to make a hardback book charging station for your lifeline, I mean, cell phone.
If you’re like me, the only time your phone is out of your sight is when you’re sleeping — and that’s only because you’re eyes are literally closed. That bad boy is with you through work, play, and relaxation time alike. But I must admit, that plain ol’ charging cord can cut into the chic atmosphere you’ve spent many an hour perfecting in your bedroom or office space.
This DIY is actually quite easy, and can be completed in about 30 minutes start to finish. So pick out a hardback (obviously one that can be cut into) from your extensive collection and let’s get started!

What You’ll Need
Hardback book
Phone Charger
Drill
X-Acto Knife/Box Cutter
Measuring tape
Glue (optional)

Step 1: Measure Your Charger Head
Use the measuring tape to measure how wide your charger head is. You’ll want a snug fit, so do as exact a measurement as you can.

Step 2: Decide Where You Want the Phone to Sit
Choose where you’ll want your phone to stand up from, using the measuring tape as a reference of how big the charger head is. I chose the approximate middle of the book for mine.

Step 3: Drill Two Holes
Use the drill to drill two hole — one for each end of the charger head. Since the iPhone 5’s charger is so small, my hole’s ran together a bit, and that’s perfectly OK.

Step 4: Make Sure You’ve Drilled Through
Press hard to make sure you drill through the cover and onto the first couple of pages.

Step 5: Cut Between the Drill Holes
Using the X-acto knife or box cutter, cut between your two drill holes or help hollow out the space if the holes are already connecting.

Step 6: Check If the Charger Head Fits
Insert the charger head into the hole to make sure it’s a good fit. Use the knife to free up some space if it’s still too tight and if you accidently cut too much, use a drop of glue on each side to make it snug again.

Step 7: Cut the “River”
Using the hole in the pages as a starting point, start to cut a “river” for your charging cord to rest in. It doesn’t have to be big, just wide enough for the cord to comfortably lie there.


Step 8: Keep Cutting Until It’s Deep Enough
You’ll need to keep cutting into and removing strips of pages until your cord head will just barely peak out of the front cover.

Step 9: Close Cover and Set Up
After the river is deep enough, insert the cord and close the cover so that the head stands up through the front cover.

Step 10: Show Off!
That’s it! You did it! Now set up your book wherever you usually charge your phone and style it to your hearts desire. Also, prepare yourself for all the compliments you’re about to get on your expert DIY work.
Posted by Emily Kelley


